Last updated January 02, 2020
The Trakr visual testing add-on is currently in beta.
Trakr visual testing is a cloud-based visual testing/monitoring service.
it works by capturing screenshots of your web-based project and performs visual testing as part of your deployment workflow or manually. If any visual defects are found, relevant project stakeholders will be notified. Adding the add-on will provide you with a free Trakr account and API access for your app.
Trakr can be used to test your web app in Heroku for many different scenarios. For example, it can test:
- Visual changes in a single environment (e.g production) over time.
- Local development environment vs remote Heroku app environment (see detailed example below).
- Between Heroku environment. see manage multiple environment documentation.
Provisioning the add-on
Trakr visual testing can be attached to a Heroku application via the CLI:
$ heroku addons:create trakr
We have received your provisioning request, you should receive an email once your Trakr user account is created/linked.
Created trakr-rectangular-27623 as TRAKR_API_TOKEN, TRAKR_PROJECT_ID
Use heroku addons:docs trakr to view documentation
After you provision the addon, the TRAKR_API_TOKEN and TRAKR_PROJECT_ID config var will be available in your app’s configuration. It contains the API token for your Trakr user account, which can be used to trigger visual testing. You can confirm this via the heroku config:get command:
$ heroku config:get TRAKR_API_TOKEN
cf160643934c3628fc736f7f6f124f35
$ heroku config:get TRAKR_PROJECT_ID
123456
After you install Trakr Visual Testing, your application should be configured to fully integrate with the add-on. You should also receive an email from Trakr confirming your user account.
Using the Add-on
There are two primary ways to use the Trakr Visual Testing addon:
Creating tests via the Trakr web UI dashboard
Building test scripts with your Heroku app’s programming language (e.g. NodeJS, Python, etc) via the Trakr REST API
Using the add-on with the Trakr web-based UI
The Trakr web-based experience is an easy way to manage and create visual testing without needing to write any testing script or code in your app. However, it doesn’t offer as much flexibility and automation as interacting with the REST API. It’s entirely possible to run visual testing without having to visit the web-based UI.
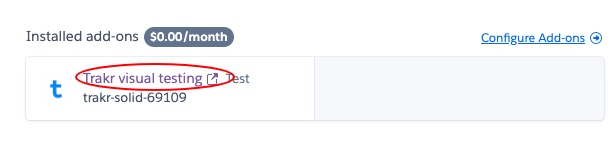
After you have installed the Trakr visual testing addon for your Heroku app, you can click the addon from the app dashboard on Heroku to go to the Trakr web-based UI to manage visual testings for your app.
You will be automatically logged-into Trakr to a corresponding testing “project” created for your Heroku app. Inside this project, you can manually create visual tests as well as manage any of the tests created via other methods (e.g. testing scripts). The project uses the URL of your app (e.g. https://your-app-name.herokuapps.com) as the default for running screenshots and tests.

If you need help on using the web-based UI, you can visit our documentation portal
Using the add-on as part of your app
Building test scripts as part of your test suites are the most flexible way of using Trakr. However, this does require programming and interacting with the Trakr REST API)
Example usage
Let’s look at an example usage scenario (with Python) of visual testing between a local and remote app environment.
Requirements
You should have a Python web app deployed with Heroku. The easiest example will be the getting started app.
You have successfully provisioned the add-on (see the provisioning section above). Installing the add-on will expose a config var named
TRAKR_API_TOKENfor your app.You can access your app locally via the
heroku local webcommand and the app should be available on http://localhost:5000You have installed Localtunnel (https://localtunnel.github.io/www/)
Preparing the test (one time)
Clone the script directory into your app directory so it looks like
{app_dir}/trakr/test.py. You will execute your Heroku commands from inside theapp_dir.Import the
TRAKR_API_TOKENandTRAKR_PROJECT_IDconfig var into your local.envfile. You can use a command such as the following to do so:
$ heroku config:get TRAKR_API_TOKEN -s  >> .env
cf160643934c3628fc736f7f6f124f35
$ heroku config:get TRAKR_PROJECT_ID -s  >> .env
123456
Running tests
Visual testing can be run whenever you have made some local changes and wants to test those changes visually before pushing it to the Heroku remote environment.
- Start your web app locally:
$ heroku local web
3:22:57 PM web.1 |  [2019-12-10 15:22:57 -0500] [20878] [INFO] Starting gunicorn 20.0.4
3:22:57 PM web.1 |  [2019-12-10 15:22:57 -0500] [20878] [INFO] Listening at: http://0.0.0.0:5000 (20878)
3:22:57 PM web.1 |  [2019-12-10 15:22:57 -0500] [20878] [INFO] Using worker: sync
3:22:57 PM web.1 |  [2019-12-10 15:22:57 -0500] [20881] [INFO] Booting worker with pid: 20881
Make sure, in your Procfile, to pass in the flag --reuse-port if you are using gunicorn. This will allow us to perform port forwarding and expose your local development environment externally.
For example:
web: gunicorn gettingstarted.wsgi --reuse-port
- Open another terminal and expose your local development environment:
$ heroku local:run sh trakr/tunnel.sh
your url is: https://trakr-project-6666666.localtunnel.me
It is important to run this using heroku local:run as it loads in your .env config vars.
- Open another terminal now that the local dev environment can be accessed, and run the command to test:
$ heroku local:run python trakr/test.py test
Your test have been triggered. You can see the result at https://app.trakr.tech/node/9999/ab39d8fjkdaldk
This will trigger a visual test between the local development environment and the remote Heroku environment. You should get a URL where you can access the test results. Do not close the local tunnel or the local app before the test is complete.
You should receive email notifications when your tests are done.
Migrating between plans
Application owners should carefully monitor their usage to ensure they are not exceeding their usage limits.
Currently, migrating between plans is only possible via the Trakr web-based user experience.
Removing the add-on
You can remove Trakr visual testing via the CLI:
This will destroy the project created on Trakr, all of the screenshot collection, visual tests and all associated data and it cannot be undone!
$ heroku addons:destroy trakr
-----> Removing trakr from dull-lake-4005... done, v20 (free)
Support
Heroku provides support requests for all add-ons through Heroku Support. If you have any questions or need anything you can add a ticket there and they will let us know.
You can email us for any Trakr visual testing support and runtime issues.